
Need Help?
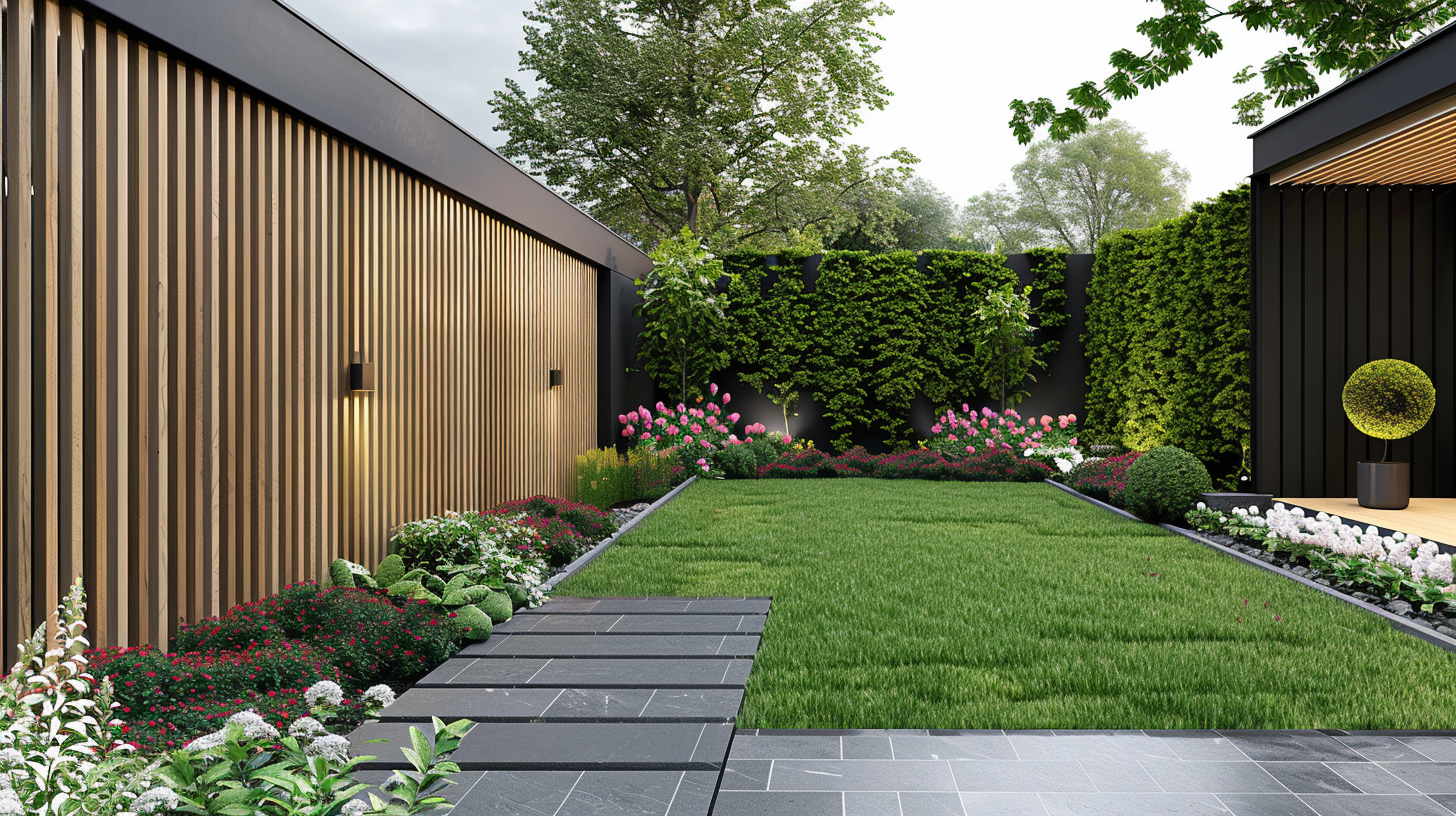
Thinking About Panel Haus Exterior Slat Wall Panels?
Not sure where to start or what you’ll need? No problem—we’ve got you covered. This guide will walk you through everything: what to prep, how to install, and tips to get the best finish from your Panel Haus exterior panels.
Congrats on kicking off your exterior design journey—we’re thrilled you’ve chosen Panel Haus for your project!
Our slat wall panels are available in many colours, designed to elevate any exterior. Here’s what you’ll need before getting started:
Joists to support your panels (cut to match your wall’s dimensions)
Wall plugs and screws to secure the joists
Colour-matched screws to attach your panels
Pro Tip: Make sure you have everything ready before installation begins.
Our panels feature a tongue-and-groove system for a smooth, seamless look. Don’t forget to factor in panel overlap when measuring.
Outdoor Installations:
Choose a dry, mild day to work—avoid direct sunlight or rain during install.
If it’s sunny, keep the panels shaded until they’re ready to go up.
Indoor Installations:
Check your building’s noise regulations (especially if you’re in a flat or shared space).
Always review all installation instructions before drilling into any interior walls.
When cutting or drilling, always:
Wear protective gloves and safety goggles
Use the correct drill bits for the material
Enlist a friend—it’s easier (and safer) with two sets of hands!
If you live in a leasehold or shared property, make sure to check with your landlord or property manager before starting your installation. It’s better to get approval upfront than to undo hard work later.
To complete your look, consider adding:
Corner trims
End trims
These help give your wall that polished, professional finish. You can find accessories and extras in the Panel Haus online store.
Our panels are designed with DIY simplicity in mind, using a straightforward installation method. If you’re handy and follow the steps, you can complete your project in a day. That said, hiring a contractor is a great option if you’d prefer peace of mind or have a larger wall to tackle.
Choose your panel colour
Gather tools (drill, screws, saw, level, etc.)
Ideal surface: brick or block walls for maximum strength
Cut joists to match your wall
Fix joists to the wall at 450mm intervals
Space screws 500mm apart for stability
Leave a 10mm gap at the base of panels to allow drainage
Double-check you have enough panels for your space
Use masking tape and a pencil to mark cutting lines
Cut panels to size with a circular saw
Start in a corner
Screw the first panel directly into the joists using colour-matched screws
Make sure it’s level!
Slot the next panel using the tongue-and-groove system, then screw it in place
Repeat until the entire area is covered
Optional Corners:
Use flush joists or end trims to finish corners cleanly and professionally.
That’s it—you’re good to go! We can’t wait to see how you bring your exterior to life with Panel Haus Slat Wall Panels.
Disclaimer: This guide is intended as general advice. For large-scale projects or tool hire, we recommend consulting with a local professional or licensed tradesperson.